Esta página aún no está disponible en tu idioma.
How to create a receipt from Ordered Items
Section titled “How to create a receipt from Ordered Items”Use this path when a new shipment arrives and you want a new receipt document. If you need to merge lines into an existing draft instead, use How to add Ordered Items to a draft receipt (Add To Receipt in the same menu).
Ordered Items (before you start)
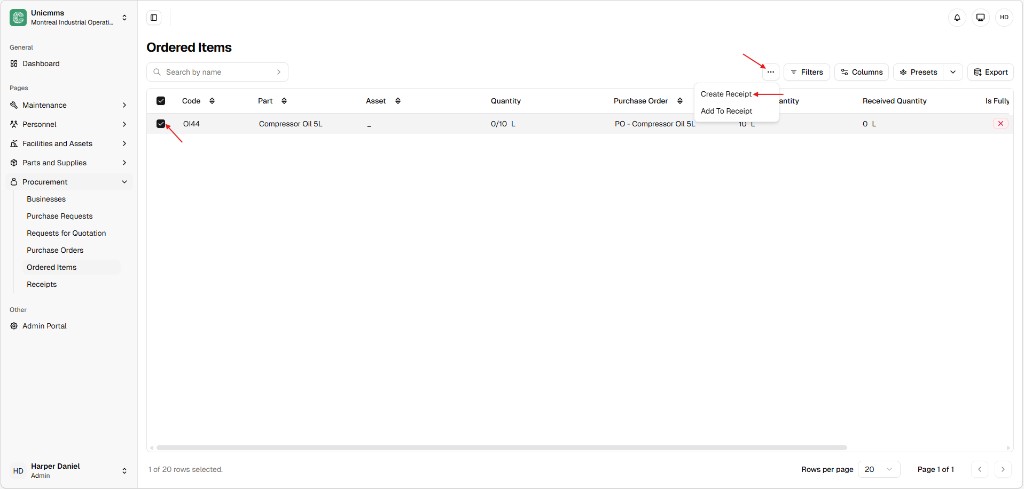
Section titled “Ordered Items (before you start)”Open Procurement → Ordered Items. Use Search by name, Filters, Columns, Presets, and Export as needed. Each row has a checkbox, a Code (for example OI44), Part, Quantity as received/ordered (for example 0/10 L), Purchase order, Ordered quantity, Received quantity, and Is fully. The footer shows how many rows are selected (for example 1 of 20 rows selected).
Step-by-step
Section titled “Step-by-step”- Navigate — Procurement → Ordered Items (sidebar under Procurement).
- Select lines — Tick the checkbox for every Ordered Item that belongs to this arrival (for example OI44 — Compressor Oil 5L linked to PO - Compressor Oil 5L).
- Start the receipt — Click More (⋯) at the top-right of the table toolbar (next to Filters, Columns, Presets, Export). Choose Create Receipt. The other option in the same menu is usually Add To Receipt for merging into a draft.
-
Configure the receipt — The Create (or New) receipt screen opens with Cancel and Submit in the header. Fill General and each line under Products.
General
Field Description Name * Short title for the receipt (for example R2 - Compressor Oil 5L). Often up to 250 characters (counter in the field). Description Optional internal notes—typically up to 1000 characters. Products
Selected ordered items appear as rows. Use New product when you need another line (if your build allows it on the same receipt).
Column Description Product Part being received (carried from Ordered Items). Stock location Shelf, bin, or area where this quantity will post (for example Production Floor A). Description Optional note on the line. Quantity Demand context, often as received / ordered with unit (for example 0/10 L before you post this receipt). Received quantity Amount you are booking now (for example 3 L for a partial delivery). Partial and over-delivery behavior—see Receipt sync, inventory, and delivery rules. Trash Remove the row when shown.
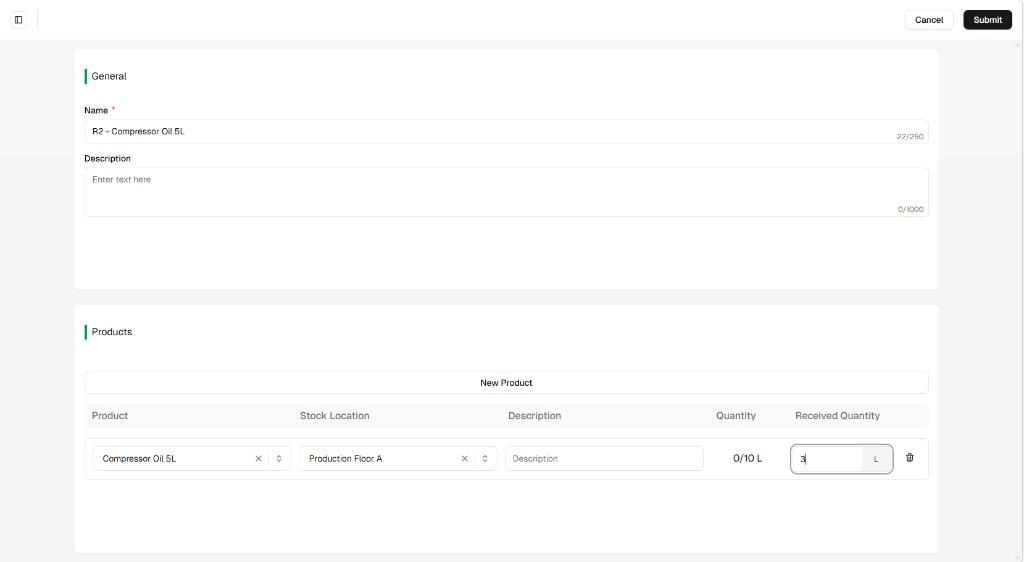
- Submit — Click Submit (top-right). Ordered Items and inventory update according to the rules in the sync article.