Ce contenu n’est pas encore disponible dans votre langue.
How to Create a Purchase Request
Section titled “How to Create a Purchase Request”A purchase request (PR) is the formal way to ask for parts or assets before procurement turns it into an RFQ, PO, or other downstream documents. This guide walks through the create dialog from the list page through submit.
Open the create dialog
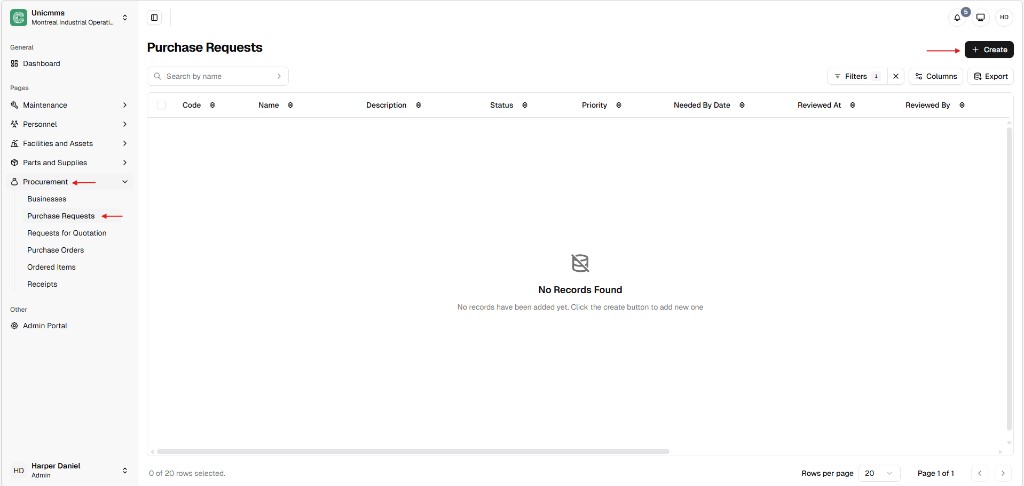
Section titled “Open the create dialog”- In the sidebar, open Procurement → Purchase Requests.
- Click + Create (top-right of the main area).
The list shows Code, Name, Description, Status, Priority, Needed By Date, Reviewed At, and Reviewed By. When there are no rows yet, the table shows No Records Found and prompts you to use + Create. Row actions (when rows exist) live under ⋯—for example Edit, Approve, Decline, Delete—depending on your role.
The create experience opens as a form with Cancel and Submit at the top. The body has two blocks: General (why and when) and Products (what and how many).
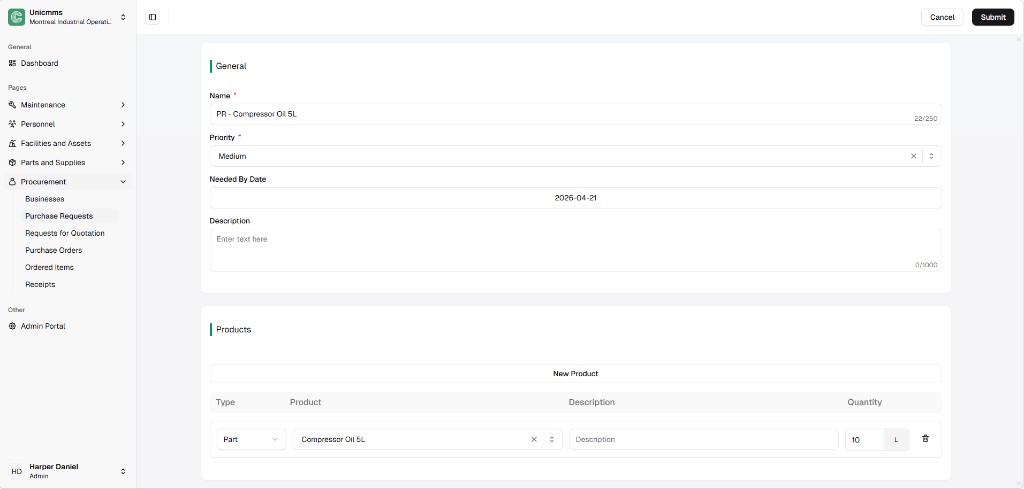
1. General section
Section titled “1. General section”This block defines why the purchase is needed and when it must arrive. Required fields show a red asterisk next to the label in the product UI. Priority may include a clear control (×) next to the dropdown on some builds.
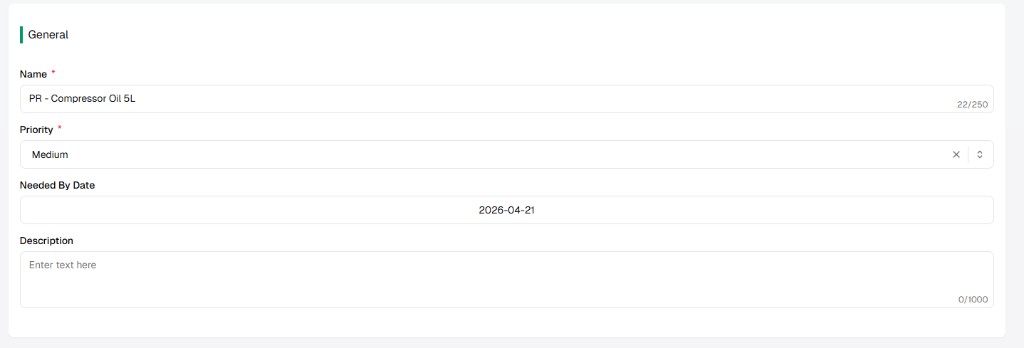
| Attribute | Description | Required? | Limit (typical) |
|---|---|---|---|
| Name * | Short title (for example PR - Compressor Oil 5L). Shown in lists and search. | Yes | Up to 250 characters (counter shown in the field). |
| Priority * | Urgency (Low, Medium, High, Emergency, or your tenant’s list) so procurement can triage. | Yes | — |
| Needed by date | Date picker for the deadline items should be on-site. | No | — |
| Description | Longer context or justification for the purchase. | No | Up to 1000 characters (counter shown in the field). |
2. Products section
Section titled “2. Products section”This block defines what you need and how much. Add one row per catalog line; use New product to append another line. Remove a line with the trash icon at the end of the row when it appears. Quantity and unit (for example 10 and L) are often shown as a single split control.
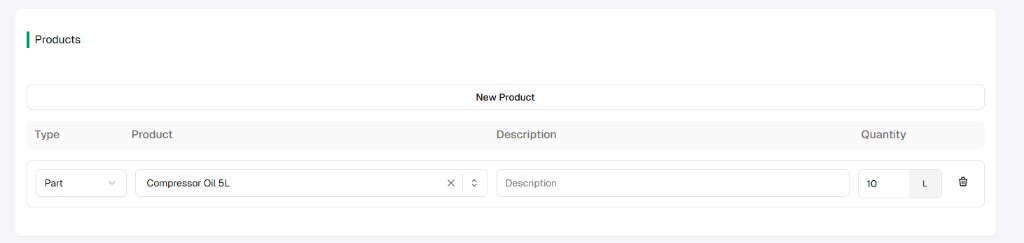
| Element | Description |
|---|---|
| New product | Adds another line to the request table. |
| Type | Dropdown — choose Part or Asset (or the options your tenant exposes). The choice filters which catalog entries appear under Product. |
| Product | Searchable dropdown of existing parts or assets, filtered by Type. |
| Description | Per-line text; may auto-fill from the catalog or stay editable. |
| Quantity | Numeric amount requested (for example 10). |
| Unit | Unit of measure beside quantity (for example L for liters) when your catalog supplies units. |
| Delete row | Trash icon — removes that line from the PR before submit. |
Submit
Section titled “Submit”Click Submit (black primary button in the header area) to record the request. Use Cancel to leave without saving when you do not want to keep a draft. After save, the system assigns a Code (for example PR21) and applies your site’s status workflow.