Site Management & Working Within a Site
Section titled “Site Management & Working Within a Site”Sites define where work and inventory apply. Administrators link people to sites on each user profile; end users with more than one authorized site choose an Active Site so the whole product shows data for that location. Licensing still controls whether someone can sign in—see Key operational logic.
See which sites a user can access (Users list)
Section titled “See which sites a user can access (Users list)”From Admin Portal → Users, the table includes a Sites column. Use it to see, at a glance, which location(s) each account may use—one site, or several (for example Main Site together with Montreal Industrial Operations).
The License column shows whether the user has an assigned seat (Licensed) or not (Unlicensed). Site assignment and licensing are separate: you can list sites on a profile, but an Unlicensed user remains blocked until a license is assigned.
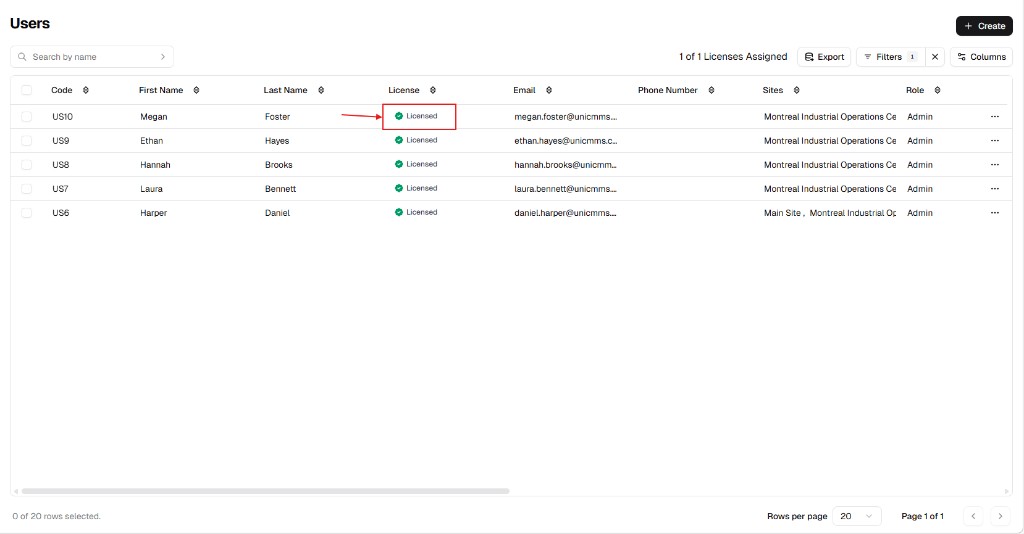
Use Search by name, Filters, and Columns to narrow or adjust the list. The same page offers + Create and Export when you need to add users or take data out of UniCMMS.
Assign or change sites on a user profile
Section titled “Assign or change sites on a user profile”You can assign a user to multiple sites so they can work across parts of your operation.
- Go to Admin Portal → Users.
- Open the user: click … → Edit, or start a new user with + Create → Create User.
- Find the Sites field (required). It behaves as a multi-select dropdown: pick one or more sites; each appears as a tag. Remove a site by clicking × on its tag.
- Click Submit to save.
Step-by-step UI detail for create and edit lives in How to add a user and How to update a user.
Assign a license (Unlicensed users)
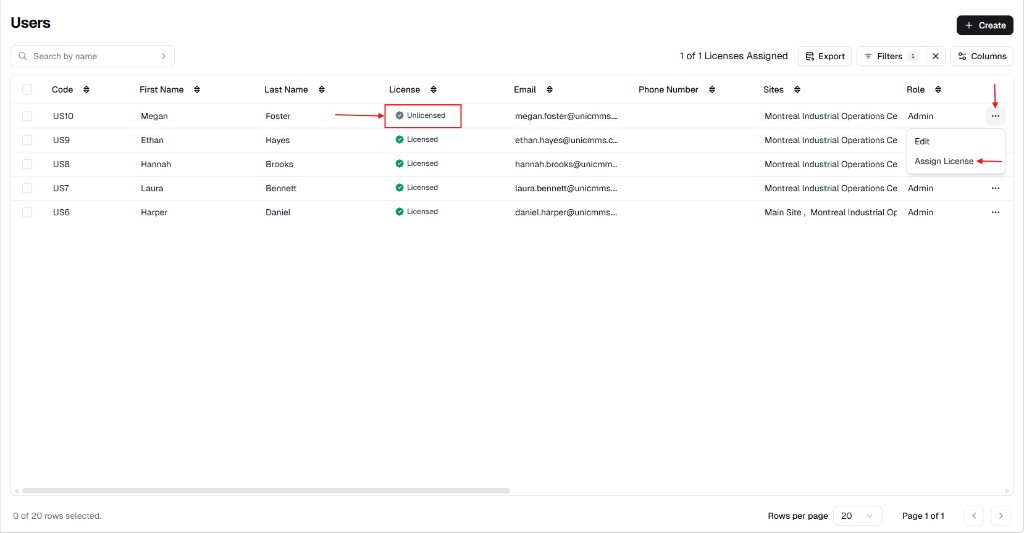
Section titled “Assign a license (Unlicensed users)”If License shows Unlicensed, that user cannot use the system until an administrator assigns a seat from your pool.
- On Users, find the row.
- Click … in the Actions column.
- Choose Assign License (and use Edit when you also need to change profile fields).
The list header may show license usage (for example 1 of 1 Licenses Assigned) so you can reconcile seats with your subscription.
To remove access later, the row menu can include Revoke License—see How to update a user for the menu pattern.
Switch your active site (Site Switcher)
Section titled “Switch your active site (Site Switcher)”When your account is authorized for more than one site, you work in one Active Site at a time. Switching changes lists, trees, and stock context everywhere in the app for your session.
- Look at the top of the left sidebar (below the product branding). The current site name is shown (long names may be truncated) with a chevron control.
- Click that area to open the Sites dropdown.
- Select a site from the list (for example Montreal Industrial Operations Center). The UI refreshes so dashboards and records match that location.
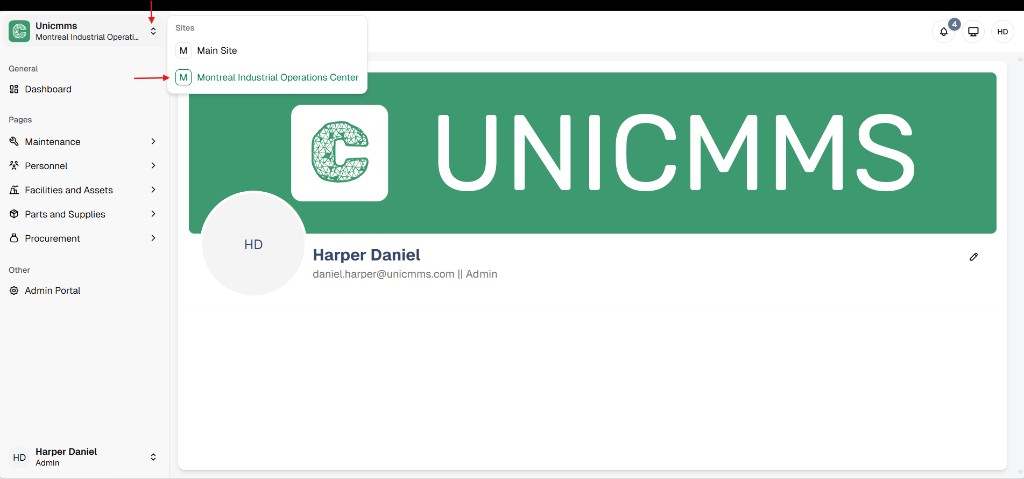
You can open Admin Portal from Other in the same sidebar when you need tenant or user settings; the Active Site still scopes operational areas such as Maintenance and Facilities.
What happens when you switch?
Section titled “What happens when you switch?”Changing the Active Site acts as a global filter for the signed-in user:
- Maintenance: Only Work Orders and Preventive Maintenance for that site are visible.
- Facilities & Assets: The asset tree updates to show equipment at the active site.
- Parts & Inventory: Stock levels reflect the warehouse or storeroom context for that site.
- Procurement: Purchase orders and cost views align with the active site’s purchasing scope.