How to Approve or Decline a Purchase Request
Section titled “How to Approve or Decline a Purchase Request”Only users whose role includes Review Purchase Requests (or an equivalent procurement approver role, depending on your tenant) can use Approve or Decline on this screen. If those actions are missing from the row menu, ask an administrator to check Admin Portal → Roles and the permission reference for Purchase Request.
In UniCMMS, Approve does not only flip a flag: it opens a Purchase Order (PO) workflow so you can assign a supplier, confirm commercial and logistics fields, then Submit. The system creates the PO automatically when that form is submitted successfully. Decline rejects the purchase request from the list menu without that PO step.
Approve — from the list to the PO form
Section titled “Approve — from the list to the PO form”1. Navigate
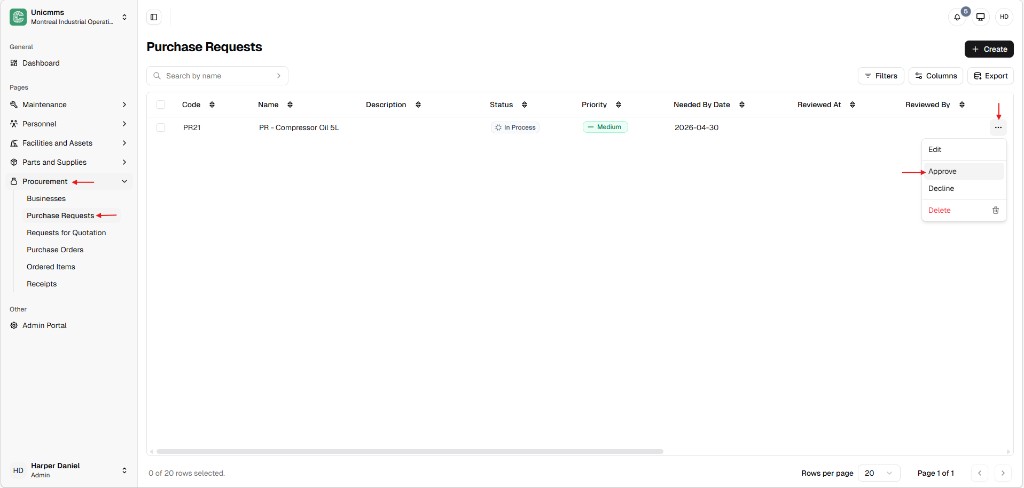
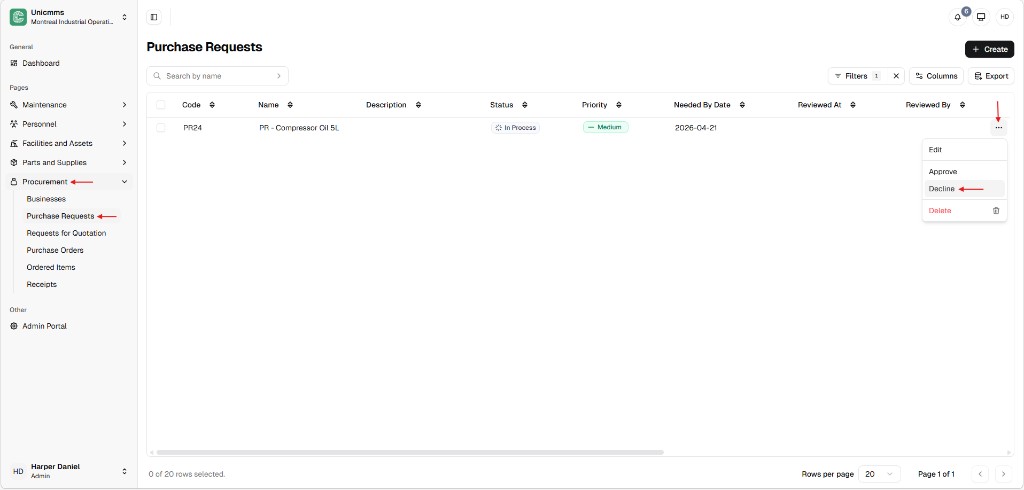
Section titled “1. Navigate”Go to Procurement → Purchase Requests.
The list shows Code, Name, Description, Status, Priority, Needed By Date, Reviewed At, and Reviewed By. Use Search by name, + Create, Filters, Columns, or Export as needed.
2. Choose a reviewable row
Section titled “2. Choose a reviewable row”Look for requests that are still awaiting your decision, typically In Process or Pending (labels depend on your workflow). Reviewed At / Reviewed By stay empty until the review path is completed.
3. Open Approve
Section titled “3. Open Approve”- On the row, click ⋯ (more).
- Choose Approve.
4. Full-screen overview after Approve
Section titled “4. Full-screen overview after Approve”After Approve, you land on a Purchase Order preparation screen. At the top you will see Cancel and Submit. The body is organized into blocks—first General and Supplier Information, then Products (and Shipping Information when you scroll).
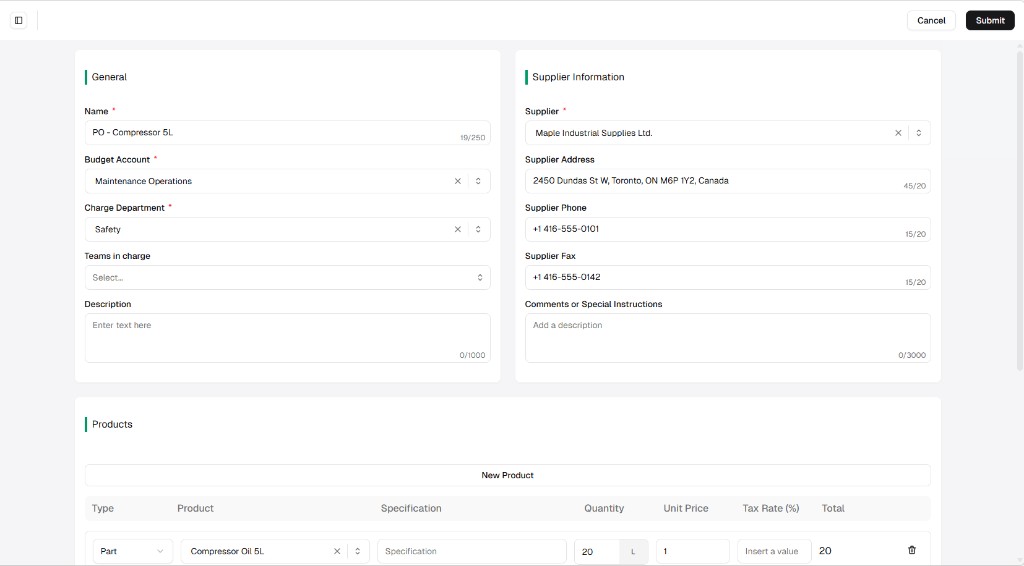
The next subsections zoom in field by field so each block is easy to follow.
Purchase Order form — section by section
Section titled “Purchase Order form — section by section”Many values are pre-filled from the purchase request and from your registry (businesses, parts catalog, accounting defaults). You must still complete required fields (marked with *) and verify totals before Submit.
General
Section titled “General”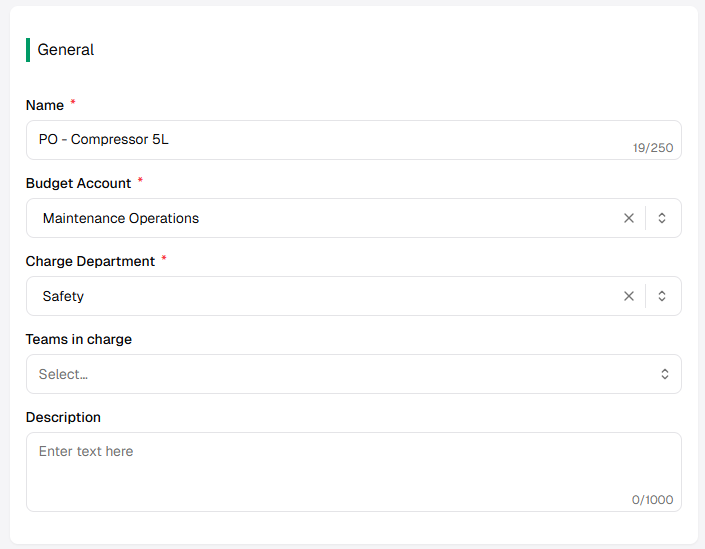
| Field | Description | Required? |
|---|---|---|
| Name * | PO title (often prefilled, e.g. from the request). Character limit shown in the UI (e.g. 250). | Yes |
| Budget Account * | Dropdown — charge the spend to the right budget line. | Yes |
| Charge Department * | Dropdown — department responsible for the cost. | Yes |
| Teams in charge | Optional team assignment. | No |
| Description | Longer notes (optional, with a character limit such as 1000). | No |
Supplier information
Section titled “Supplier information”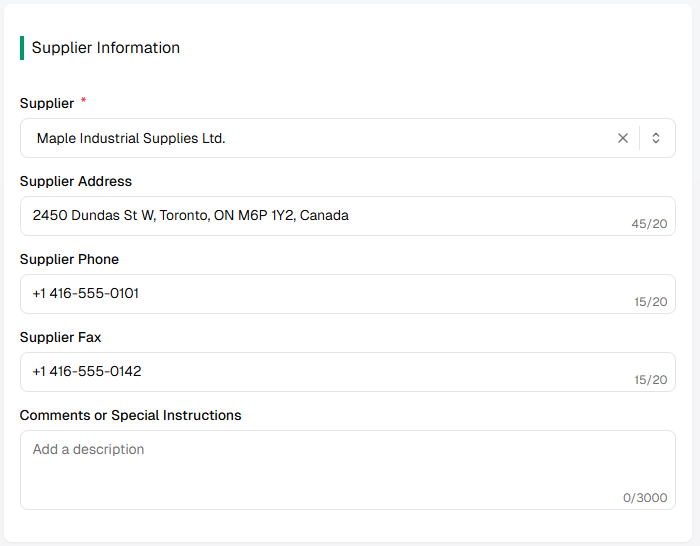
| Field | Description | Required? |
|---|---|---|
| Supplier * | Searchable dropdown of Businesses / vendors. Picking a supplier fills address, phone, and fax when that data exists on the business record. | Yes |
| Supplier Address | Auto-filled from the supplier profile when available; you may override. | No |
| Supplier Phone | Same pattern as address. | No |
| Supplier Fax | Same pattern as address. | No |
| Comments or Special Instructions | Free text for the supplier (large limit, e.g. 3000 characters). | No |
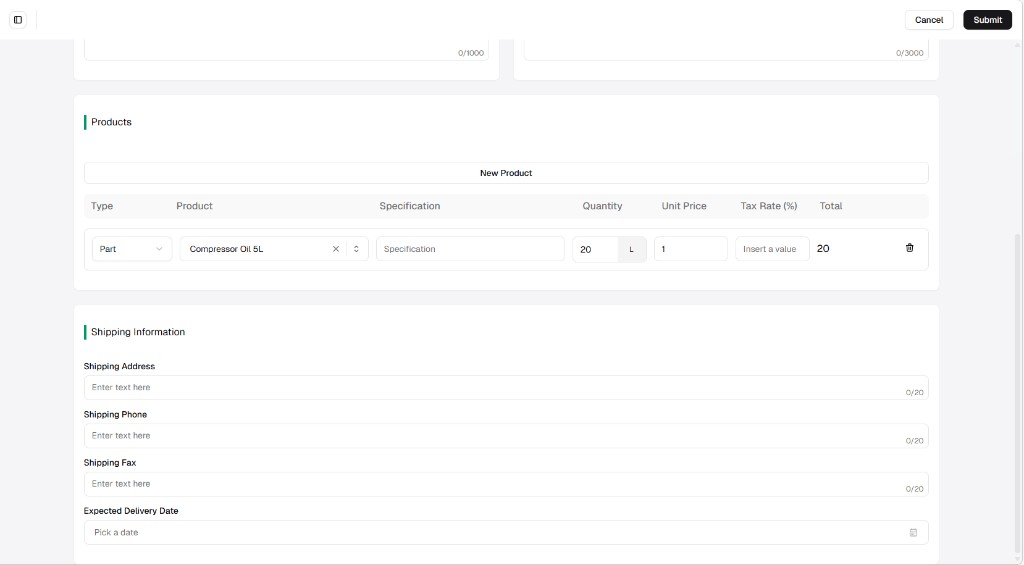
Products
Section titled “Products”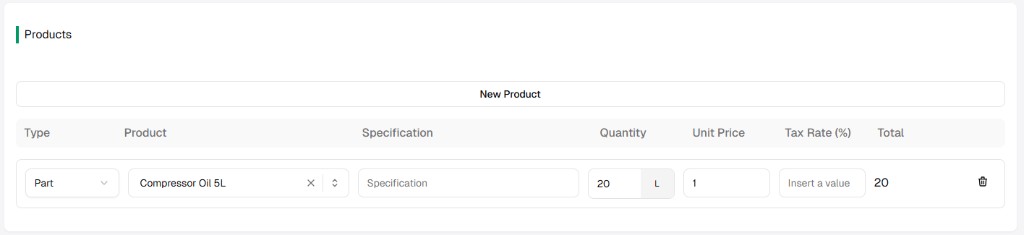
| Element | Description |
|---|---|
| New product | Adds another line to the PO. |
| Type | Line category (e.g. Part). |
| Product | Catalog selection (carried from the PR when applicable). |
| Specification | Optional line detail. |
| Quantity / unit | Amount and unit of measure (e.g. 20 L). |
| Unit price | Price per unit; drives line Total with tax rules on your build. |
| Tax rate (%) | Enter when your process requires tax on the line. |
| Total | Calculated line amount (read-only or derived in the UI). |
| Trash | Removes the line. |
Shipping information
Section titled “Shipping information”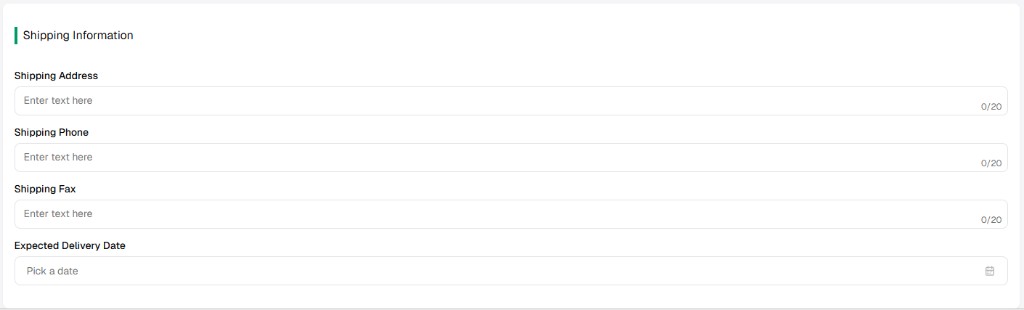
| Field | Description |
|---|---|
| Shipping address | Where goods should be sent; may prefill when supplier or site defaults apply—always editable. |
| Shipping phone / Shipping fax | Contact for delivery; same idea as address. |
| Expected delivery date | Date picker for when you expect receipt. |
Submit — automatic Purchase Order creation
Section titled “Submit — automatic Purchase Order creation”- Complete every required field (*) and review Products totals and Supplier / Shipping details.
- Click Submit (primary action at the top of the form).
On success, UniCMMS creates the Purchase Order automatically from this screen. The originating purchase request is updated as resolved in your workflow (for example Approved), and Reviewed At / Reviewed By reflect the reviewer once the operation completes—exact labels and timing follow your tenant configuration.
Use Cancel to leave without creating a PO (behavior may discard or keep a draft depending on your version).
Decline (from the list)
Section titled “Decline (from the list)”Decline is handled from the same ⋯ row menu as Approve. It does not open the Purchase Order form—it opens a confirmation step so you can record why the request is rejected. That feedback is intended for the requester (for example so they can adjust quantity, timing, or justification and resubmit if your process allows).
Step 1 — Choose Decline on the row
Section titled “Step 1 — Choose Decline on the row”- Go to Procurement → Purchase Requests.
- Find the request (use Search by name if needed). It should still be in a reviewable state (for example In Process).
- Click ⋯ at the end of the row.
- Choose Decline.
Step 2 — Confirm decline and add a reason
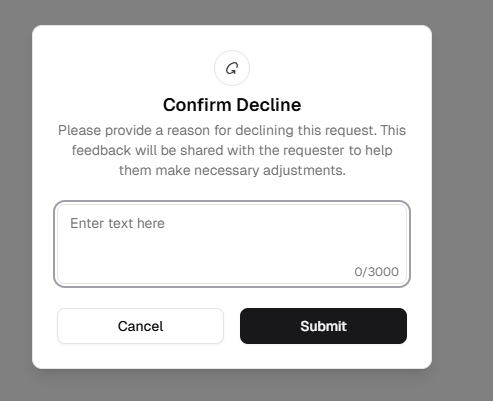
Section titled “Step 2 — Confirm decline and add a reason”UniCMMS shows a Confirm Decline dialog. The message explains that your reason will be shared with the requester to help them understand what to change.
| Control | Description |
|---|---|
| Reason (large text area) | Enter clear feedback (placeholder Enter text here). A character counter is shown (for example 0 / 3000). |
| Cancel | Closes the dialog without declining— the PR stays as it was. |
| Submit | Confirms the decline with your text and completes the action. |
After you submit the decline
Section titled “After you submit the decline”- Status moves to Declined (or your tenant’s equivalent).
- The requester receives the decline outcome and your reason (subject to your notification and visibility settings).
- Reviewed At and Reviewed By are stored for accountability, consistent with an approval audit trail.