How to Create a Procedure Template
Section titled “How to Create a Procedure Template”Follow these steps to build standard operating procedures (SOPs), safety checklists, or maintenance workflows.
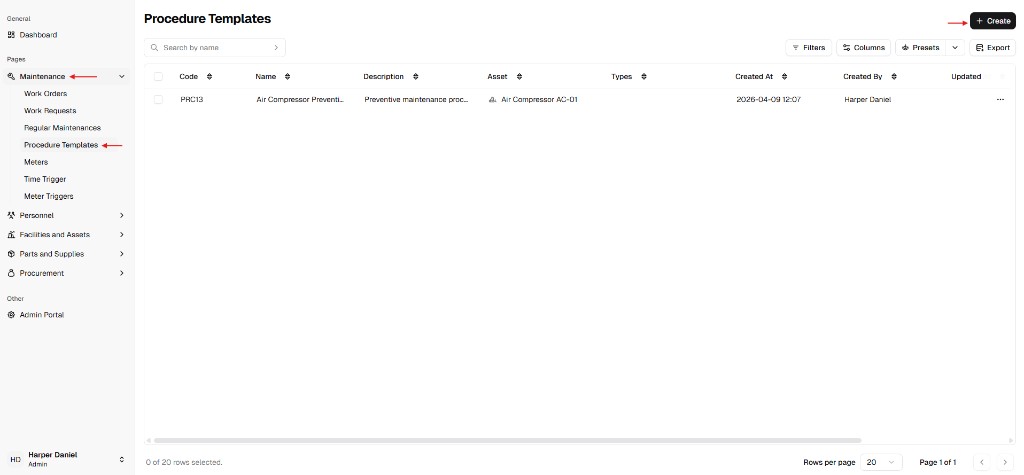
Step 1: Navigate to Procedure Templates
Section titled “Step 1: Navigate to Procedure Templates”From the main sidebar, expand Maintenance and select Procedure Templates. Click the + Create button in the top-right corner.
Step 2: Define General Parameters
Section titled “Step 2: Define General Parameters”| Field | Instruction | Required |
|---|---|---|
| Name | Enter a clear identifier (e.g., “Air Compressor Daily Pre-Start Check”). | ✅ Yes |
| Asset | Link this procedure to a specific asset. Leave blank for a global template. | — |
| Types | Categorize the template using the dropdown (e.g., “Preventive”). | — |
| Description | Provide overarching instructions or safety context for the technician. | — |
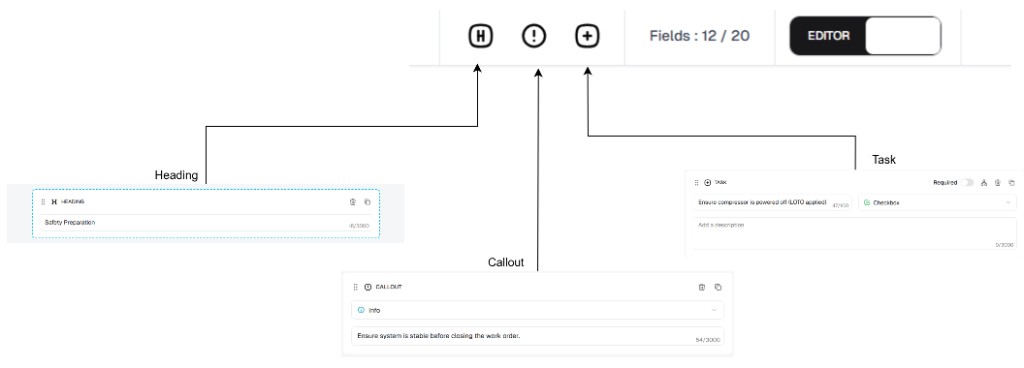
Step 3: Understand the Builder Toolbar
Section titled “Step 3: Understand the Builder Toolbar”Use the top toolbar to construct your workflow. You can add a maximum of 20 fields per template.
| Button | Function |
|---|---|
| H (Add Heading) | Inserts a visual separator to group tasks into distinct sections. |
| ! (Add Callout) | Inserts a non-actionable informational block (e.g., a safety warning). |
| + (Add Task) | Inserts an actionable step that the technician must complete. |
These three controls are the standard builder buttons: H → Heading, ! → Callout, + → Task. The counter Fields : n / 20 shows how many blocks you have used versus the template limit.
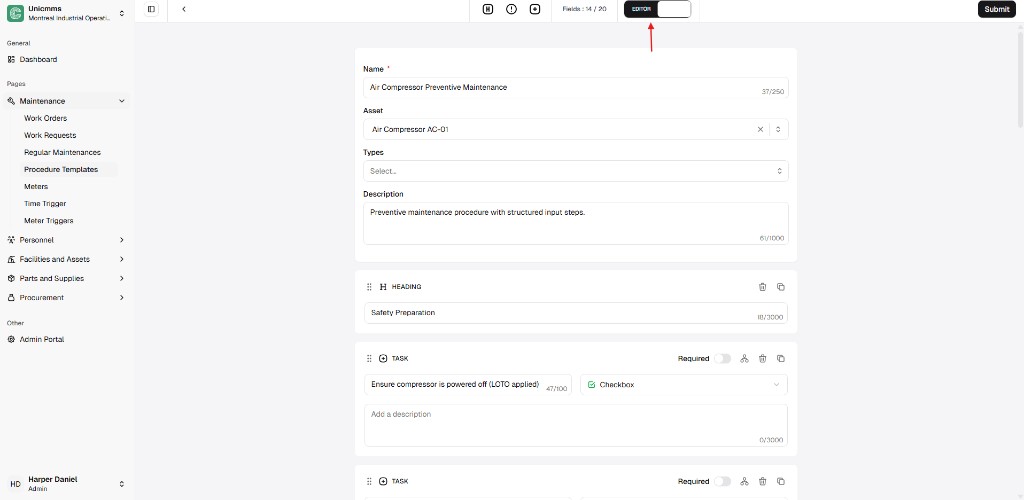
Step 4: Configure Tasks and Inputs
Section titled “Step 4: Configure Tasks and Inputs”When you add a Task block:
- Enter the Task Name and Description.
- Toggle Required if the technician must complete this step to submit.
- Select the Input Type from the dropdown menu (see About Procedure Templates for full reference).
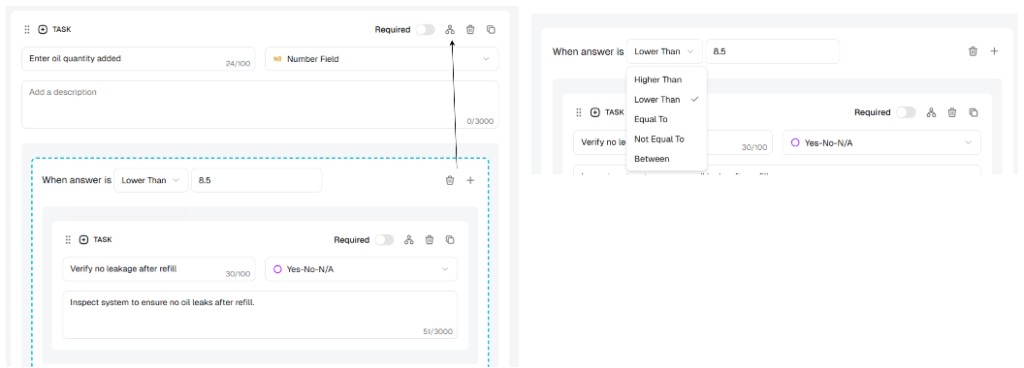
Step 5: Configure Conditional Logic (Optional)
Section titled “Step 5: Configure Conditional Logic (Optional)”Build dynamic workflows where specific follow-up tasks only appear based on a technician’s answer.
- Activate Logic: On any Task block, click the Logic Tree icon.
- Set the Condition: Define your rule using “When answer is” with operators: Higher Than, Lower Than, Equal To, Not Equal To, or Between.
- Define the Value: Enter the target value.
- Add Sub-Tasks: Click + inside the logic block to create follow-up tasks.
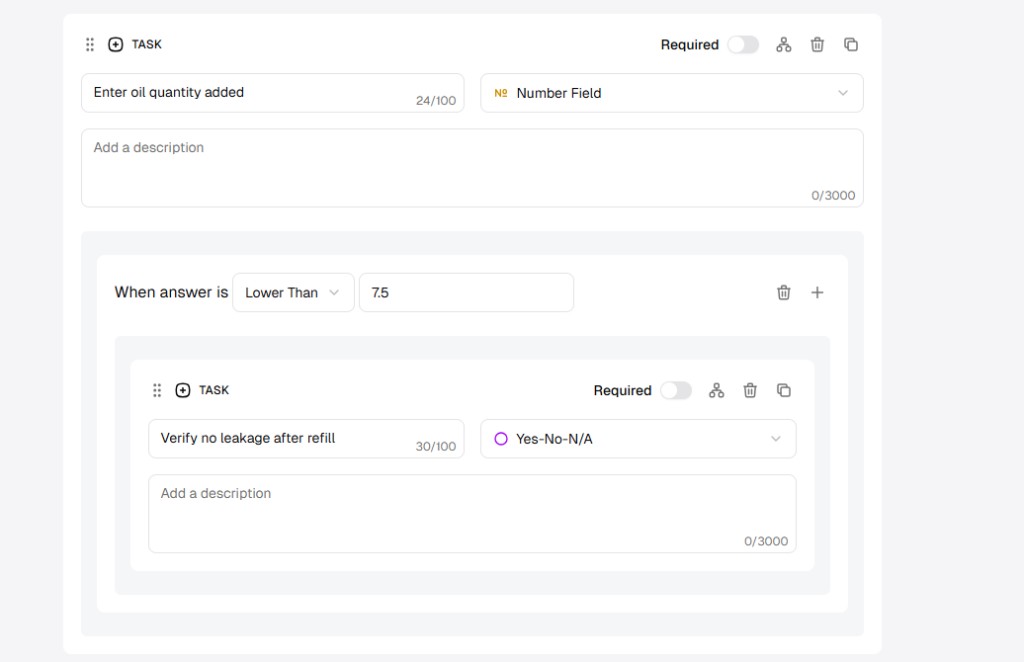
Advanced: Add one or more sub-tasks from a task
Section titled “Advanced: Add one or more sub-tasks from a task”Advanced users can attach multiple sub-tasks to the same parent task condition.
For example:
- Parent task: record a number (e.g., oil quantity).
- Condition:
When answer is Lower Than 8.5. - Sub-tasks: add one or more follow-up checks (e.g., leak verification, refill confirmation, inspection notes).
You can keep adding sub-tasks with + in the condition block. Each sub-task appears only when the condition is met.
Read condition behavior (runtime)
Section titled “Read condition behavior (runtime)”At runtime, the parent answer is evaluated against your condition rule:
- If condition is false (example: entered value
9while rule isLower Than 7.5), nested sub-tasks stay hidden. - If condition is true (example: entered value
7while rule isLower Than 7.5), nested sub-tasks appear immediately.


Step 6: Preview and Save
Section titled “Step 6: Preview and Save”- EDITOR mode — for building and configuring.
- PREVIEW mode — shows exactly how the SOP will look to the technician.
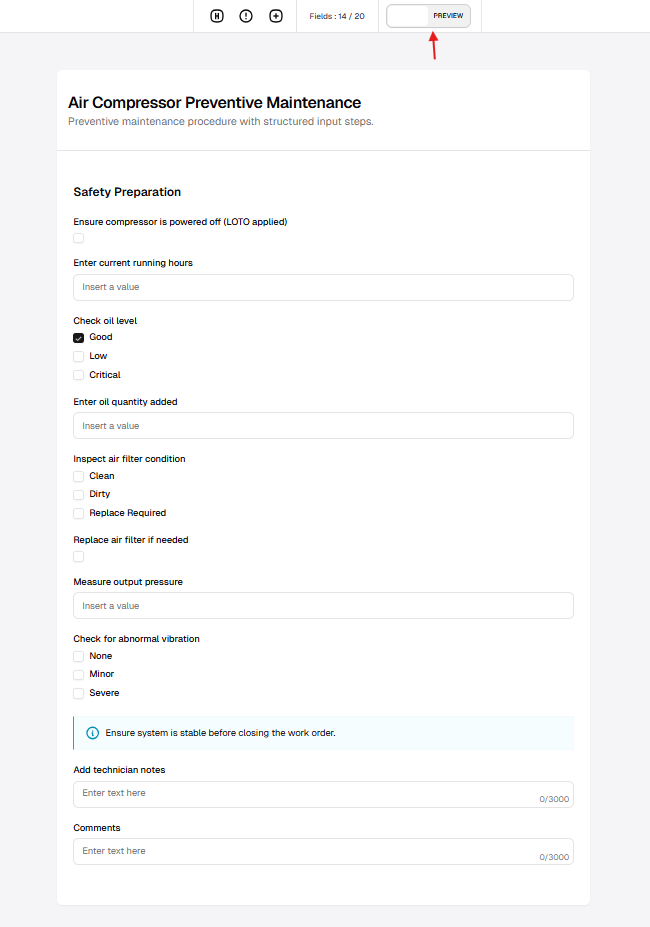
Review in Preview mode, then switch back to Editor and click Submit.